../Skinning tutorial
Skinning Oxygenator is fairly easy. But though a simple look is created in minutes, more advanced customization is possible and will take some more. First, a skin is a collection of specific sized/named .bmp files. You'll need at least two: back.bmp and bar.bmp. There's 4 more that are optional.
back.bmp needs to be 177 x 21. Within this area, the bar is put in the middle and sized 145 x 13, by default (more options below), so we'll leave that out. Like this:
Now let's add some color...
.. a bit 3D effect...
..and some decoration:
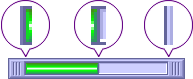
Now for the bar. Used a full sized bar.bmp, 145 x 13, filled with a gradient and this is what I get:
It's something, but it's missing a 3D feel for the bar. Here's where the bbar.bmp (begin bar) and ebar.bmp (end bar) come in.
Their height needs to be 13 again, width can be anything but for a good working skin better keep them a bit small. For this thing I created two 2 x 13 bitmaps and now it looks like this (IE5.5 users, hover image to zoom):
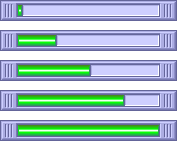
Note that I also decreased bar.bmp's width 4 pixels. Total width of bar.bmp, bbar.bmp, ebar.bmp should always be 145 pixels. Making it wider will make it overlap the area at the end, when memory is filled near 100%. Note that you can create only bbar.bmp or ebar.bmp without the other, but (only exception is when using a cache.bmp) total width should be 145.
Two bitmaps left. First there's cache.bmp. Only needed when you've used an ebar.bmp and added some shadowing or smoothing effect, which should get hidden when the bar is at 100%.
Check screenshot below (hover zooms again) to spot a tiny difference at the end of the bar, 1-pixel wide shadow... details matter ;).
cache.bmp gets displayed at the end of the bar area and can be set to cover those effects. There come some limitations and rules with it. First, cache.bmp will start at 159,4 (x,y). The area for the bar, as set above, ends at 161 (x). So, cache.bmp forces the bar to end at 159. It's a good idea to start at 18 then, instead of 16. This can be done by adding two pixels from the background into bbar.bmp:
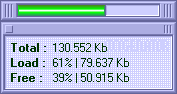
Width of cache.bmp defines how many pixels of ebar.bmp will get covered at 100%. Here it's 3 pixels wide, so last 3 pixels of ebar.bmp will not be shown at 100%. Here's a shot from the schemechecker:
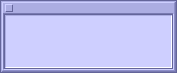
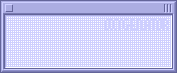
The last one's details.bmp. When you rightclick Oxygenator, and choose "show details", you'll get some advanced info. The background can be changed making this bitmap, sized 177 x 73. There's two area's to consider on this one. The close button uses a 12 x 12 area on the upperleft, with one pixel left above and left. But you can use a smaller area just for looks. Then there's the text. No exact rules here, just be sure it fits.
There's some space left for some decoration...
Finally, the color of the text can be customized by adding a textcolor.txt to the skin. Just put a dollar sign + hex value for the color in, like here it's "$003300" (no quotes).
.. depending on which app you use to derive your hex value, if you find it creating a funny color, mirror the format. So, ccbbaa instead of aabbcc.
That's about it. Find this example skin here (3 kB).
../Tips/Notes
#1: Take the easy road, use the schemechecker. May look unnecessary, but it's really good at pointing out those little mistakes :).
#2: You can decrease the height of the bar by incorperating parts of the background into bar.bmp (and bbar.bmp, ebar.bmp and cache.bmp). No need for it in this example, but have a look at the "Mana" skin for a bar with decreased height and width.
#3: A shadow for the details view captions can be created by adding it to the details.bmp (shot above).
#4: Oxygenator has one little bug, only seen when using ebar.bmp and cache.bmp. When the bar is at 99%, cache.bmp doesn't cover ebar.bmp correctly (coverage starts at 160,4 instead of 159,4).